Smart Contract Whitelist Mechanism
Posted on May 11, 2022 • 5 minutes • 949 words • 中文
Noted that this was previously published on medium and move to my blog.
Introduction
Whitelist is a great way to promote NFTs project and reward early entrance/ enthusiastic participants. There are a bunch of ways to implement the whitelist mechanism and each method comes with its own advantage and disadvantage. And now there are mainly 3 ways of implementing whitelist mechanism and now I am going to introduce them and talk about their pros and cons.
Most primitive way — Store it in storage
For developers who are familiar with other language and modern computing system, storing data in heap or storage seems to be a quite reasonable and easy way to handle a series of data.
So to store whitelist in storage, you can simply declare a mapping to record all valid address that is eligible to whitelist mint. However, using this way will cause you A LOT OF GAS and is a really inefficient method. However, it will be easier for anyone to test whether he or she is on the whitelist through etherscan or a few lines of code.
Pros: Easy to Valid, Easy to Code, Easy to add an address or remove an address
Cons: Really inefficient, Really expensive for publisher
The smart way I — Merkle Tree Airdrop
The other way to perform a whitelist will be availing merkle tree. Merkle tree is an important player in the blockchain. Merkle tree avails the property of hashing that a slight change in input will result in completely different outputs, and the fact that probability of two inputs resulting in the same output is nearly impossible.
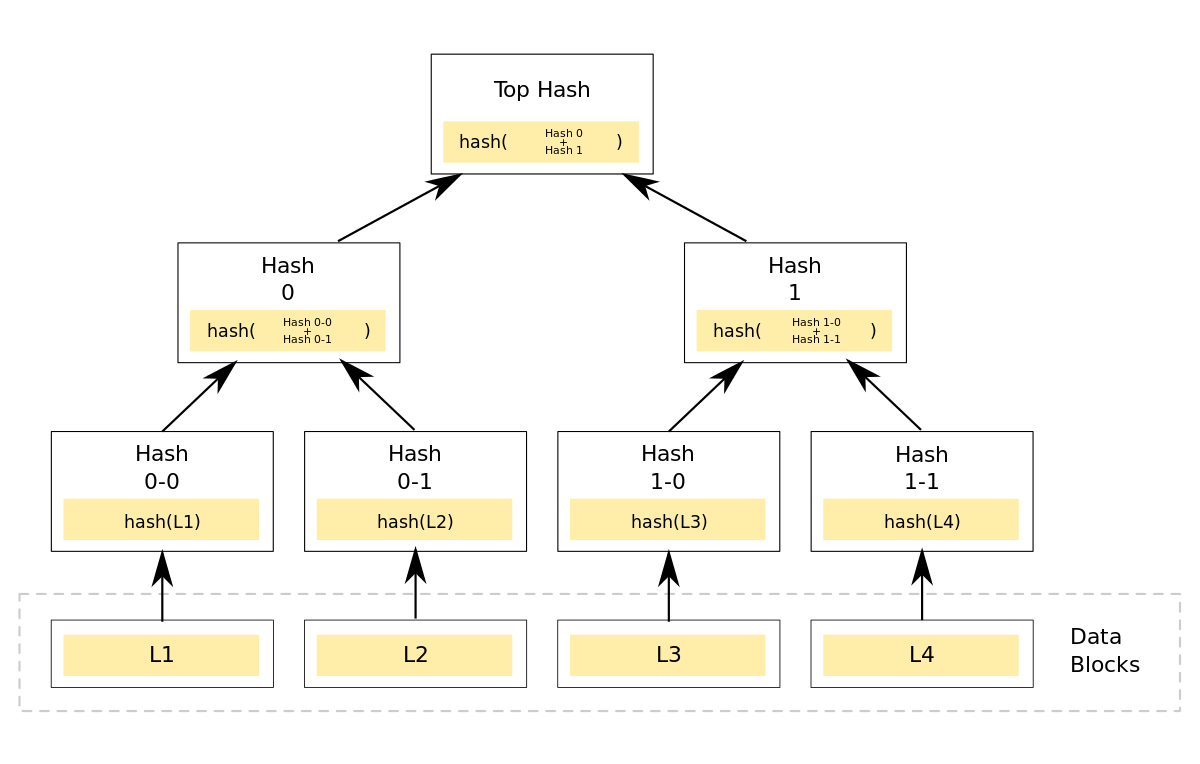
The structure of merkle tree is shown below. The hash of the current node equals hashing of its left subnode, right subnode, and its data. Thus, from the property of hashing, any change will result in a completely different output; we can use this property to implement whitelist.

So, let’s imagine you want to know whether L1 equals an address, you can extract Hash 0–1, Hash 1, and the address that is willing to be tested. Then, you follow the hashing rule and compare the output of hashing with the Top Hash. It the result is the same, you can ensure that L1 equals the input address.
However, to do so, you will need to generate a merkle tree and take half of the minting process off-chain in order to save gas. We will use javascript to generate the merkle tree. If you are more familiar with ether.js, you can also use ethers.utils.solidityKeccak256 to hash the pair too. Also, remember to store the JSON file as below: {"<address>": <amount>, “<address>”: <amount>}. You can also change the pair to another type to adjust to your need.
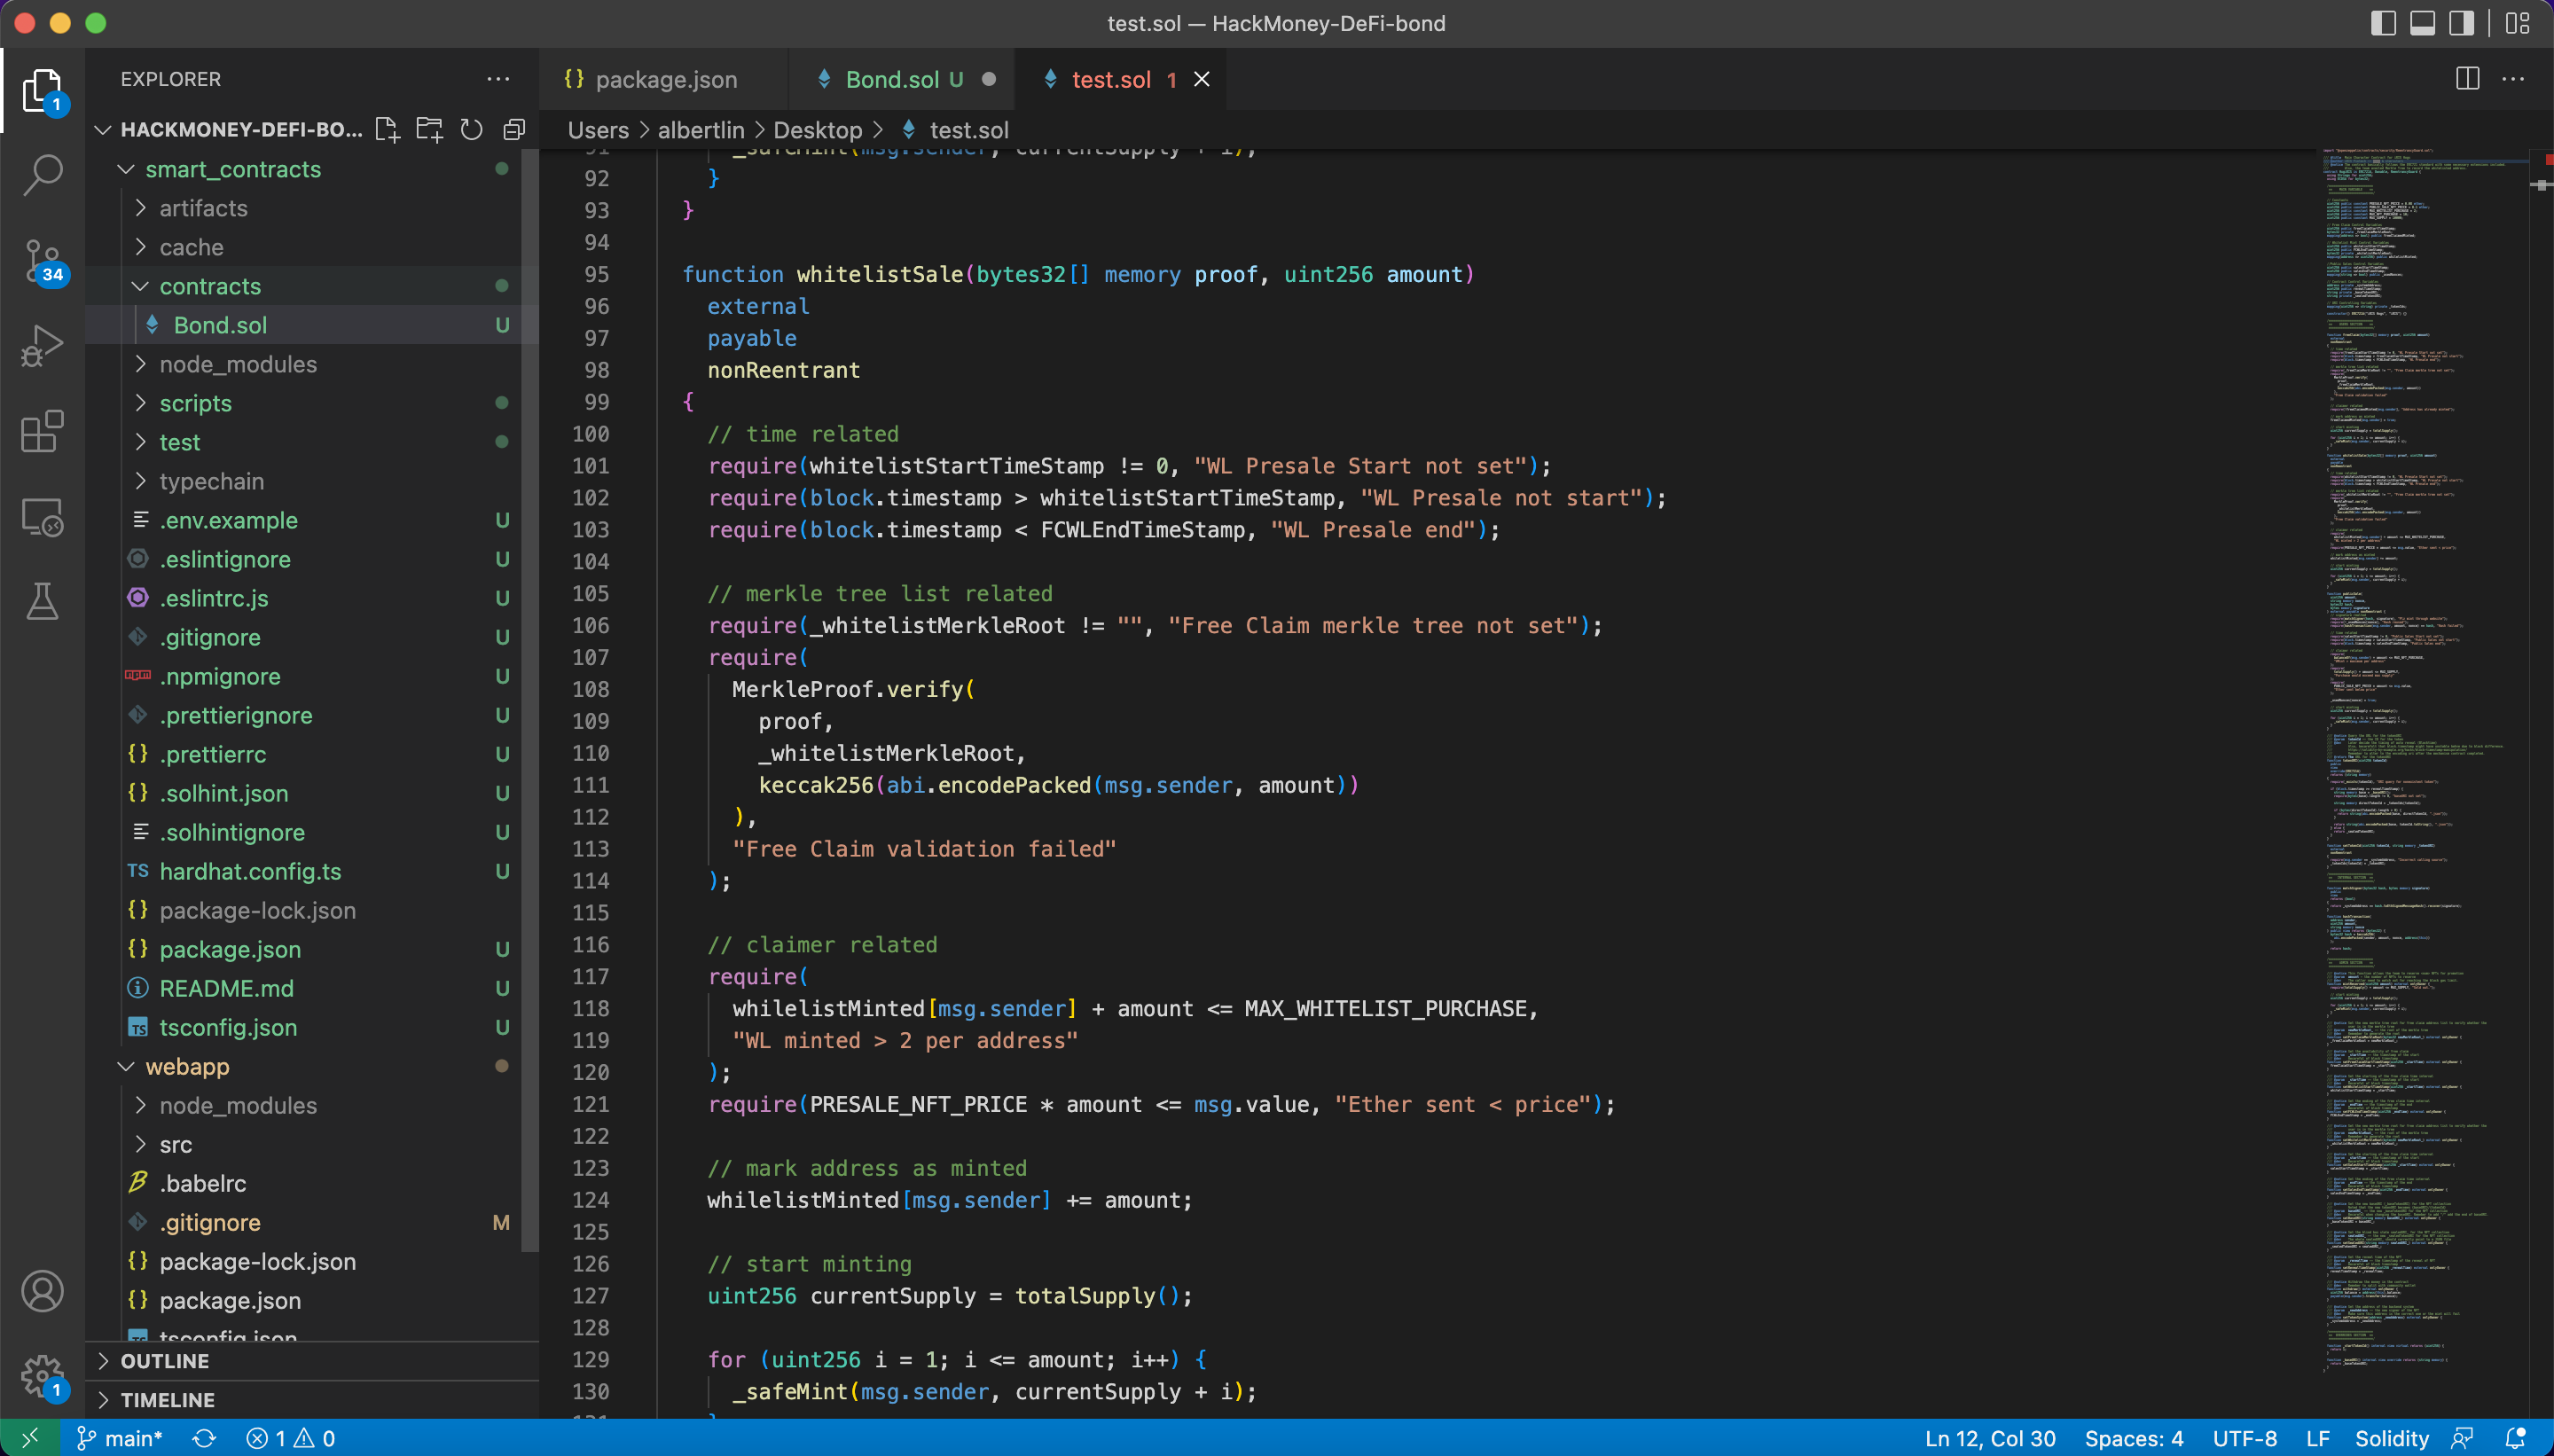
You will need to store the root in the contract via solidity function. And then on-chain verification with the library MerkleProof. Thus, whenever someone wishes to mint, you have to generate the proof for the user whether in frontend or backend with tree.getHexProof function to generate the bytes32[] proof. You can see the comment in the checkTree function for more detailed implementation.
However, this means that you have to update the _freeClaimMerkleRoot whenever you wish to adjust the whitelist.
Pros: Economic efficient, easy to Valid
Cons: Slightly more gas for user to mint, Need to reset the root every time you wish to alter the whitelist
The smart way II — Backend Signature
The last way is also cheaper than the first way. However, the last way is a bit more centralized than the previous way. So, this method avails the mechanism of signing a message. You need to set up an address at the backend and keep it credentialed. And then, whenever a whitelisted user wishes to mint, you need to first verify it and the backend. After you verify it, you can sign the message and pass it back to the user. And then, the user can use the signed message and mint it.
But you may ask, how to make sure no one can forge the signing message? The reason is that if you sign a message with your private key, you will get a hashed message. And then, you can generate the public key with the hash message and the message before hashing. Thus, if you store the public key at the contract and sign the message with the private key at the backend, you can make sure no one can fake the message.
However, to prevent replay attacks, you can use a nonce to ensure that the signed message will not be used maliciously. Thus, the whole signing process will be as below:
Noted that one can even save some more gas by splitting the signature into (r, s, v) and pass it into the contract. Thus, the contract will not need to split the singature on chain.
const signature = signner.signature;

const r = signature.slice(0, 66);

const s = "0x" + signature.slice(66, 130);

const v = parseInt(signature.slice(130, 132), 16);
Thus, after you generate the hashing message, namely hash and signature at the return data, you can pass it to the frontend for the user to mint NFT. Thus, you have to set up the verification on-chain.
Pros: Cheaper for developers, easier to manage the whitelist at the backend
Cons: More gas require to mint, less decentralized
Conclusion
There are a lot of ways to implement a whitelist mechanism. Each way is accompanied by its pros and cons. Thus, developers should carefully think about the needs and find a balance between each way. Also, I will continue to follow this article and write a depth inspection into the gas of the three methods. Keep an eye on my Twitter medium.

